
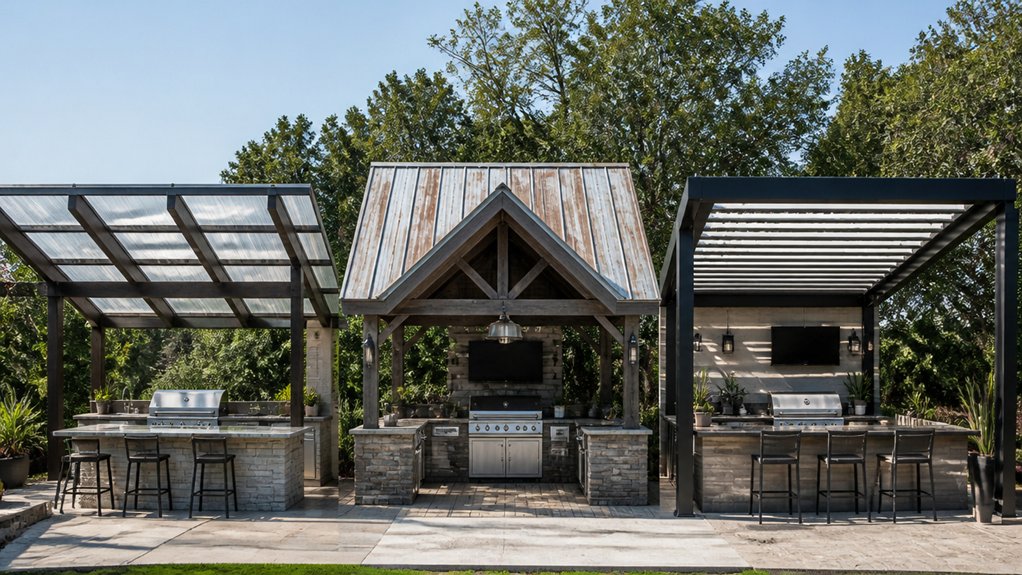
Selecting a roof for an outdoor kitchen requires careful consideration of several practical factors. Climate conditions, material durability, maintenance demands, and budget constraints all influence the final choice. Understanding your local weather patterns is essential before making any final decision.
Different roof types each offer distinct advantages and drawbacks. Pergolas provide partial shade while maintaining an open feel, whereas awnings deliver more complete coverage. Polycarbonate panels and solid covers represent the opposite ends of the spectrum, offering varying levels of protection and light penetration.
Performance in various environments differs significantly across these options. Pergolas work well in mild climates but offer limited protection from heavy rain or intense sun. Solid covers provide maximum protection but can feel enclosed and may require more structural support.
Budget and maintenance needs should guide your final selection. Some materials require regular upkeep, while others prove more durable with minimal care.
Weighing long-term costs against immediate expenses helps ensure you choose a roof that fits both your lifestyle and your wallet.
How Climate Affects Your Outdoor Kitchen Roof Choices
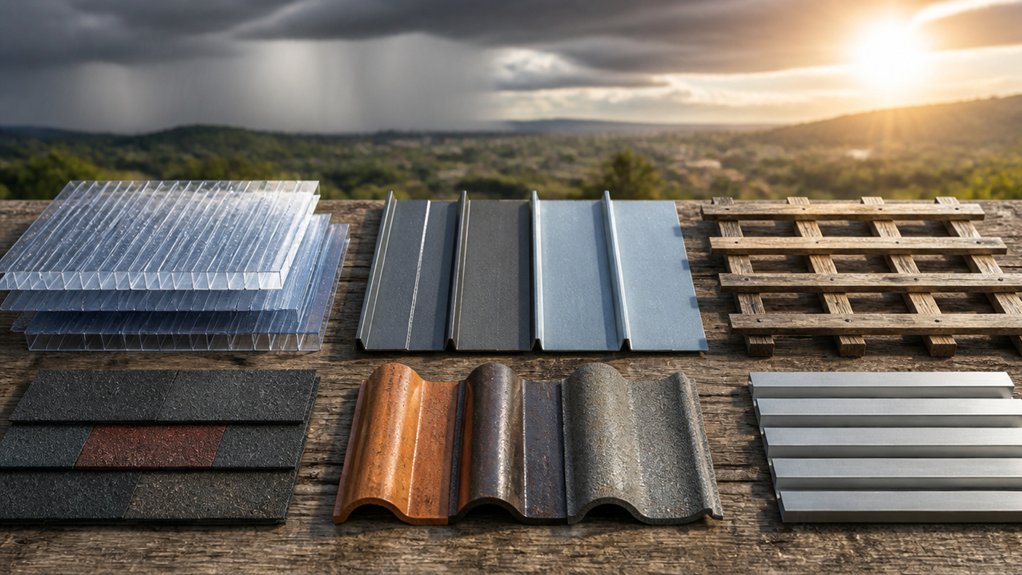
Your local climate is one of the biggest factors when picking an outdoor kitchen roof. Different regions need different solutions, so let’s break down what works best for your area.
Hot, Dry Climates
Reflective materials like metal or light-colored tiles are your best friends here. They bounce heat away instead of soaking it up, keeping your outdoor kitchen cooler and more comfortable.
Rainy Areas
Sloped roof designs with solid drainage systems prevent water from pooling and causing damage. Durable materials that shed water quickly will save you from mold and rot down the line.
Freeze-Thaw Regions
Materials that flex with temperature changes work best. Polycarbonate and metal can handle the constant expansion and contraction without cracking or warping.
Coastal Locations
Salt air eats away at most materials, so stick with corrosion-resistant options. Aluminum and stainless steel components stand up to the harsh environment much better.
Windy Areas
Strong winds demand secure fastening systems and designs that cut through the air smoothly. This prevents your roof from lifting or becoming unstable during storms.
Know Your Weather Patterns
Check your region’s temperature swings, rainfall amounts, and storm frequency. This knowledge helps you pick materials and designs that truly last.
Comparing Roof Types: Pergolas, Awnings, Polycarbonate, and Solid Covers
Once you understand your climate needs, it’s time to pick the right roof style. Your choice should match both your weather conditions and how often you’ll use your outdoor kitchen.
Pergolas have open lattice designs that let sunlight and breeze through. They give you some shade but won’t protect much from rain or snow.
Awnings use retractable fabric panels for flexible shade control. They handle light rain fairly well and let you adjust coverage based on the weather.
Polycarbonate panels are lightweight and block UV rays. They work in most climates and still let you see the sky, making them a practical middle ground.
Solid covers made from metal or composite materials offer the strongest protection. They shield your space from rain, snow, and intense sun all year long.
Each roof type has different costs, maintenance needs, lifespan, and looks. Think about your local weather patterns, how much you want to spend, and how often you’ll cook outside. These factors will help you find the best fit for your outdoor kitchen.
Budget Breakdown: What Each Roof Type Really Costs
Cost varies significantly based on size, materials, and how complex the installation is. You might spend anywhere from a few hundred to several thousand dollars.
Popular Roof Style Options
Pergolas run $1,500 to $5,000 for basic wood versions. Aluminum upgrades cost more. Awnings fall in the $2,000 to $6,000 range, with motorized add-ons pushing an extra $1,000 to $2,000.
Polycarbonate covers land between $2,500 and $7,000. Panel thickness and frame quality make the difference. Solid covers are pricier at $5,000 to $15,000 or more because of their durability and structural strength.
What Pushes Prices Higher
Labor typically makes up 40 to 60 percent of your total bill. Permits and inspections add $500 to $2,000. Site accessibility, local rules, and your climate all affect the final number.
Going the DIY route saves money if you have the right skills. Just know that skipping professional installation means taking on the responsibility yourself.
Maintenance Needs by Outdoor Kitchen Roof Material
Different roof materials need different care routines. Taking time to understand what your roof requires helps you protect your investment and keep it working well for years to come.
Polycarbonate Panels
Clean them occasionally and check for cracks or yellowing. Catching problems early prevents bigger issues down the road.
Metal Roofs
Annual inspections matter here. Look for rust, loose fasteners, and remove any debris buildup. These checks help prevent leaks and structural damage.
Wood Shakes
Treat your wood roof every two to three years to fight rot and insects. This regular care is essential for wood longevity.
Aluminum Structures
These are pretty low-maintenance. Just keep them clean and repaint occasionally when needed.
Fabric Covers
Pressure wash your fabric roof regularly. Reapply UV protection to prevent fading and material breakdown.
Asphalt Shingles
Inspect after storms or heavy weather. Don’t forget gutter cleaning to keep water flowing properly.
Plan Your Maintenance Schedule****
Budget both time and money for seasonal tasks. Skipping maintenance speeds up wear and tear, making repairs expensive or forcing early replacement. Choose a material that fits your ability to maintain it. This practical approach keeps your outdoor kitchen roof functional and performing well.
Essential Features: Ventilation, Drainage, and Shade
A functional outdoor kitchen roof needs to handle three important jobs: ventilation, drainage, and shade protection.
Ventilation
Heat and smoke can get trapped under your roof while cooking. Open-sided designs and slatted panels let air flow freely, keeping things cool and comfortable. This simple solution makes a big difference in how pleasant your cooking experience feels.
Drainage
Water needs somewhere to go. Pitched roofs naturally direct rain away, while flat designs need gutters and downspouts to prevent pooling. Proper drainage protects both your cooking area and the foundation underneath.
Shade Protection
Direct sunlight ages materials faster and makes cooking uncomfortable. A solid roof gives you the most protection, but polycarbonate panels let light through if you prefer brightness. Either way, shade keeps you and your equipment safer during long cooking sessions.
These three features work together to create a space that handles real weather and cooking demands. You get comfort, durability, and a kitchen that lasts.
Matching Your Roof to Your Home’s Aesthetic
Matching Your Roof to Your Home’s Aesthetic
Your outdoor kitchen roof should blend with your home’s style. Pick materials and colors that echo your existing structures for a unified look across your property.
Style-Specific Options
Modern homes look great with flat or sleek metal roofs. Traditional houses shine with pitched roofs topped in asphalt shingles or clay tiles. Rustic spaces pair beautifully with wood pergolas or metal frames in natural finishes.
Getting the Colors Right
Color harmony ties everything together. Match your roof tones to your siding, trim, or accent colors. Gray, tan, and bronze are safe choices that work with most design styles.
Choosing Your Materials
Cedar, aluminum, polycarbonate, and metal each bring their own character to the space. They look different and perform differently too. Before deciding, check out photos of similar homes to see what appeals to you.
Installation and Long-Term Care: What’s Next
Getting Started with Installation
Once you’ve chosen your roof design, it’s time to bring it to life. Hire a licensed contractor who knows outdoor structures inside and out. They’ll handle permits and inspections so you don’t have to worry.
The installation itself involves building the frame, adding support beams, and laying down your roofing material, whether that’s polycarbonate, metal, or wood shingles.
Keeping Your Roof in Great Shape
Seasonal inspections catch problems early. Look for debris buildup, loose fasteners, and any water damage. Clean your gutters regularly to stop water from pooling.
Different materials need different care. Metal roofs should be checked for rust. Wood needs staining or sealing every two to three years. Polycarbonate panels may yellow over time and eventually need replacing.
Making Your Investment Last
Good maintenance adds years to your roof’s life. Most outdoor kitchen roofs last ten to twenty years with proper upkeep. Material quality and your local climate both play a role in how long it lasts.
Set aside money each year for maintenance. This small investment pays off by keeping your roof strong and functional for decades.
Frequently Asked Questions
Do I Need a Building Permit Before Installing an Outdoor Kitchen Roof?
Yes, most jurisdictions require building permits before installing an outdoor kitchen roof. One should contact their local building department to verify specific requirements, as regulations vary by location and roof specifications.
Can I Install an Outdoor Kitchen Roof Myself or Should I Hire Professionals?
Like maneuvering through treacherous waters, DIY roof installation demands extensive expertise. Homeowners should hire professionals for structural integrity, weather protection, and building code compliance. Professional installation guarantees durability and eliminates costly mistakes.
What Safety Certifications or Standards Should Outdoor Kitchen Roofs Meet?
Outdoor kitchen roofs should meet local building codes, wind resistance standards, and fire safety regulations. Installation requires compliance with NFPA guidelines and proper structural engineering. Homeowners must verify permits and inspections with local authorities before construction begins.
How Do I Winterize My Outdoor Kitchen Roof in Cold Climates?
Like a ship battening down for a storm, one should inspect for damage, clear debris, apply weatherproof sealant to seams, guarantee proper drainage, trim overhanging branches, and consider removable covers or tarps for extended protection during harsh winter months.
What Warranty Options Are Available for Different Outdoor Kitchen Roof Types?
Outdoor kitchen roof warranties vary by material type. Metal roofs typically offer 20-40 year guarantees, while polycarbonate panels provide 10-15 years. Wood structures usually include 5-10 year coverage. Manufacturers often offer extended warranties for additional premiums and specific maintenance requirements.
Conclusion
Selecting an outdoor kitchen roof is like building a foundation for a house—each layer supports the next. Climate, budget, materials, and aesthetics work together to create a functional space. Homeowners must weigh pergolas against solid covers, consider maintenance demands, and guarantee proper drainage and ventilation. The right choice protects investments while enhancing outdoor living. Installation quality and ongoing care determine long-term performance and durability.